26 June 2006
Faceplate and 'funny' bending
Here:
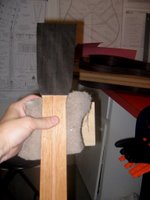
Faceplate glued and rough shaped. Trying to get a nice 'Santa Cruz' Style shape on the headstock. Got a really nice piece of Ebony on there, underlayed with a thin Maple veneer; should look nice with the Curly maple binding as well -
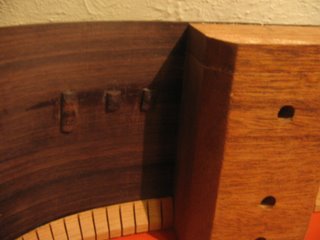
A funny bend by the folks at LMI - the curvature is correct, but the wood looks marred here. Probably too much heat in one spot. ?? I didn't have any issues with this spot; however I think one of the other folks on KGB had a similar issue with their Mahogany and broke when installing in the mold. Just goes to reinforce the fact that you really have to inspect all the wood and supplies that you get; no matter where it comes from!!
More guitar pics
Here is a picture of my 'cleats' that I made when I fixed the crack in the side.
Not too bad, a little rough around the edges; literally, I forgot to guard against filing down against the side, but no one will hopefully see up there anytime soon, except me.
This picture shows the layout from the Tailblock. All looks pretty straight from here. The only thing off in this picture is that my ends near the tailblock did not line up just right. After doing more reading I've seen the proper way to cut the sides to length [by installing 1 side at a time in the mold with clamps. Then make your cut to center] I did it the uneducated way, I measured, marked, measured again, pulled from the mold and cut. It is tough to make a square cut on a rounded material; I know that now.
I also know there is more than one way to skin a cat - and many cats on the KGB site are doing it just their way(s) as well; glad we've all got a great source of info there too!!
The kerfing has been installed on the bottom (which will actually be the top of the guitar). Just waiting to sand with my sanding board and get the top braced and we'll have 1/2 the box enclosed.
This is tarting to come along nicely. I am really enjoying this work as well. It's really a reward to see where things are going and see that i'm creating a nice piece of art here.
Ready to sand profile for top
22 June 2006
The man...
Mind Clutter
Welcome KitGuitar Forum Fans:
Glad to see you've been visiting my 'building site' I hope to have more pics of the project up soon.
The side crack is behind me and we're getting ready to do bracing, waiting to get some time to do it all in one fowl-swoop!
Also working on putting the faceplate 0n the headstock for now, just keeping busy!...
Subscribe to:
Posts (Atom)